Friday 23 October 2015

Simple Braised Tofu with Minced Meat and what better way to serve it with plain rice congee during this hazy conditions than eating out

First of all, my sincere apologies for MIA for quite a while.  Well, finally I am able to squeeze some time for my readers and followers who have been actively visiting my cyber home even though there isn't any new updates from me.  Of course from the live traffic feed I am able to see new and existing viewers still keep coming in.  I am touched!!!!  My sincere gratitude for all your generous support.
Well, with the current hazy conditions which hit Singapore and Malaysia, most of us have not been feeling well and even our appetite are affected too.  In fact most of the time, I have been cooking savory or plain rice congee for lunch or dinner for my family.  In case you are interested, you may click at this link for more congee recipes rice congee/porridge.
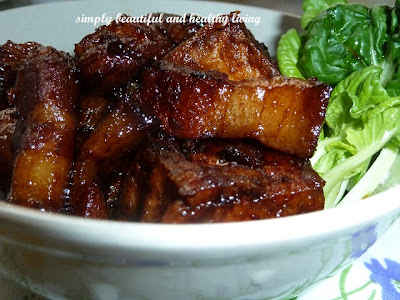
As I was scratching my head what to cook the other day, I realised that I had a medium sized of pork belly in my freezer and 5 pieces of hard tofu.  Aha... why not cook a simple dish to go with plain rice congee?  So, here's this simple yet appetizing recipe.

Ingredients :
- 1 strip of pork belly (blanched and cut into small pieces or minced)
- 5 pcs hard tofu (cut into eight, slightly fried until golden brown)
- 1/2 tbsp fermented soy bean paste/tau cheong
- 1 bulb of garlic (finely chopped)
- 1 Bombay onion (finely chopped)
- water (enough for braising)

Seasonings : (to taste)
- a dash of salt
- a dash of pepper
- a dash of mixed spice
- 2 tbsp light soy sauce
- 1 tsp oyster sauce
- 3 tbsp caramel sauce (reduce the amount if you don't like your dish to be in dark colour)
- 1 tsp sugar

Method :
1) Heat some oil in a wok and pan fry the tofu until slightly brown.

2) Set the tofu aside.

3) With the remaining oil, add pork belly and stir fry for a while.

4) Then add garlic, onion, and fermented soy bean paste and continue stir fry until aromatic.

5) Add in fried tofu and seasoning. Stir and mix well.

6) Finally add enough water and cover.

7) Let it boil over high heat for about 5 minutes. Then, lower the heat and let it simmer until the gravy is thickened.

8) It takes about 30 to 45 minutes depending on the fire and pot/wok used. Add water if you want more gravy.

9) Dish up and serve with plain porridge or steamed rice.

Another similar dish you might be interested.
Have a great weekend ahead and cheers!


Sorry to inform that for the time being, I have disabled comment box as I won't be able to return visit to my fellow bloggers who are kind enough to drop me a line or two. The comment box will be enabled when I am not so tied up with my work schedule. However, you may contact me by leaving your message or comment at SIMPLY BEAUTIFUL AND HEALTHY LIVING FACEBOOK. My sincere apologies for any inconvenience caused. Thanks for visiting my blog and have a nice day :)

Thursday 16 July 2015

Are You One of Those Who Don't Take Cakes with Eggs Simply Because You Are Health Conscious, Vegetarian or Allergic To It? Try This Simple and Easy to Make Eggless Kurma (Date) Cake

Are you health conscious?  Do not favor eggs, allergic to it or just being a vegetarian?  Love cakes but most commercial cakes have eggs? Fret not! You still can savour your favorite cakes with this simple and easy to make eggless cake.  Besides, it's cheap too if you make it yourself.

Honestly speaking, I have never eaten eggless cakes and when I chanced upon Eggless Cakes & Cookies cookbook by Jamie Jong, and out of curiosity, I just bought the book.  After looking through some of the recipes in the book, I told hubby that all the recipes are actually quite healthy.  Hubby asked me to try one of the recipes and without any hesitation, I chose the easiest recipes and modified it accordingly.  As I still have some kurma (dates) bought during this Ramadan month, I decided to use some. However, after the cake is baked, the slices of kurma sunk to the bottom. Ah... no big deal anyway.  Surprisingly, the cake is moist, soft and fluffy! 

Eggless Kurma Cake
Ingredients :
- 250gm self-raising flour (sifted)
- 170gm unsalted butter (softened)
- 100gm castor sugar
- 120ml evaporated milk
- 5 pcs (or more) kurmas (sliced thinly)  

Method :
1) Cream butter and sugar till light and creamy.
2) Then, gradually add evaporated milk and beat well.
3)  Fold in sifted flour.
4)  Stir in kurma and mix well.
5)  Pour mixture into a greased 7" cake tin.
6)  Bake in preheated oven at 160° C for 1 hour or till cooked.

Isn't this egg free cake is easy peasy to make?  Give this a try and you will be glad you did it!
Healthy and guilt free cake for your family
Here I wish all my Muslim readers 
"Selamat Hari Raya Adilfitri"
Dengan Ingatan Tulus Ikhlas
Maaf Zahir Batin

 To receive new updates, do LIKE SIMPLY BEAUTIFUL AND HEALTHY LIVING FACEBOOK

Sorry to inform that for the time being, I have disabled comment box as I won't be able to return visit to my fellow bloggers who are kind enough to drop me a line or two. The comment box will be enabled when I am not so tied up with my work schedule. However, you may contact me by leaving message at SIMPLY BEAUTIFUL AND HEALTHY LIVING FACEBOOK. My sincere apologies for any inconvenience caused. Thanks for visiting my blog and have a nice day :)

Monday 11 May 2015

Soft and Fluffy Healthy Wheat Bran Oat Bread

This soft and fluffy wheat bran oat loaf is another one of my new creations which my family quite enjoy it.  To those who have yet to try making your very own homemade bread, I can tell you that it's super easy especially when you use bread machine and understand your basic dough.  Once you have mastered the technique of bread making, there's no turning back!  From there, you can experiment and try something new that suits your family taste buds. What I usually do is to do some minor adjustment or variations and experimenting with flour, water and adding family's favorite ingredients.
This wheat bran oat bread is based on my previous Raisins Oat Bread and I am glad that this experiment is quite a success.  It's soft, light and fluffy, has a good amount of fiber and delicious!  
Now let me show you how easy it is to have your very own homemade bread which is healthy and enjoyed by your family.  

Healthy Wheat Bran Oat Bread
Ingredients for 2 loaves
- 290ml water
- 5tbsp wheat bran
- 5tbsp rolled oat 
- 4.5tbsp sugar
- 1.5tsp Himalayan salt
- 3tbsp olive oil
- 350gm unbleached wheat flour (all-purpose flour)
- 150gm unbleached bread flour (high protein flour)
- 5 tbsp milk powder
- 1.5tsp tsp instant yeast

- 1.5tbsp softened butter (add in when smooth dough is formed)

Method :
1)  Put all measured ingredients except butter in the bread machine pan in accordance to the above sequence or in the order recommended by the bread machine manual .

2)  Select dough if you are baking the bread in the oven.  (I used dough method function).  Otherwise, select basic white bread.  Please take note different machine has different functions.

3)  Add 1.5 tbsp softened butter when smooth dough is formed but kneading is still in the process.

4)  Remove dough from bread pan when you hear beeping sound.

5)  Put the dough on a lightly floured surface and roll out the dough with a rolling pin into an oval shape.  Then, roll from the top to the bottom. Flatten and roll again into oblong shape.  Pinch the seals at both ends and bottom.

6)  Place the shaped dough into greased and lightly floured loaf pan.  Cover with damp cloth and let it proof for another 1 hour or more for a second time proofing.

7)  Once they are doubled in size, bake in a preheated oven at 170°C - 180°C for about 40 to 45 minutes or until golden brown; depending on individual's oven.  Do adjust the temperature and timing accordingly.

8)  Remove and cool on wire rack.
Isn't this wheat bran oat bread is better than the commercial wholemeal bread and all white bread ?
It has higher content of fiber than some of the standard commercial bread and best of all, it's without any preservative!!
The texture suits us perfectly; it's a bit chewy, light, soft and fluffy
The texture and flavor suits our taste buds too
This healthy bread recipe is a keeper and should you have any doubts, you can leave your message at  simply beautiful and healthy living Facebook page and I will try my best to assist you in your homemade bread making.
~Happy bread making and have a fabulous week ahead~
Click the above logo for simply beautiful and healthy living Facebook Page


To receive new updates, do LIKE SIMPLY BEAUTIFUL AND HEALTHY LIVING FACEBOOK. Sorry to inform that for the time being, I have disabled comment box as I won't be able to return visit to my fellow bloggers who are kind enough to drop me a line or two. The comment box will be enabled when I am not so tied up with my work schedule. However, you may contact me by leaving message at SIMPLY BEAUTIFUL AND HEALTHY LIVING FACEBOOK. My sincere apologies for any inconvenience caused. Thanks for visiting my blog and have a nice day :)

Thursday 30 April 2015

How to DIY Vanilla Extract and Having an Almost Neverending Supply of Vanilla Extract in your Pantry (Homemade Vanilla Extract)

Talking about vanilla.  Do you know the difference between vanilla essence and vanilla extract?  I am sure those who are not into baking may not know the difference.  Well I never favor commercial vanilla essence.  The fragrance is too strong to my liking and smells like perfume to me.  Very fake!  Moreover I believe, commercial vanilla essence is sweetened too.  So, prior to my decision to DIY my own homemade vanilla extract, I either omitted the use of vanilla in my baking or if I needed it, I only use premium quality commercial vanilla extract.  There is quite a big difference between vanilla extract and vanilla essence.
So, what is the difference between vanilla extract and vanilla essence/flavor? Vanilla extract  is produced by soaking the vanilla pods or beans in a mixture of alcohol base like vodka and/or water. Whereas for vanilla essence, it is chemically produced  and often give a synthetic taste to your baking.  Vanilla essence is much much cheaper than the natural vanilla extract.  So, if you need to buy commercial vanilla extract, do look at the label to confirm that it's vanilla extract and not vanilla essence or flavor.
However, I am glad to say that I have no regrets to DIY my homemade vanilla extract.  It's so easy to do and you only need 2 ingredients and 3 simple steps to be a proud owner of  your homemade vanilla extract!  It's advisable to buy premium grade vanilla beans as the quality of your vanilla extract depends on the quality of your vanilla beans.  
When choosing vanilla beans, avoid beans which are smoky, brittle, dry or mildewed.  Good quality beans should have a rich aroma.  Always choose plump beans with a thin skin to get the most seeds possible.  To test, gently squeeze the bean between your fingers and it should be soft and pliable enough to wrap around your finger without breaking.  The pods should be dark brown and almost black in color.
Now, it's time to DIY your very own homemade Vanilla Extract :
Recipe and info source : Beanilla
Ingredients  :  
- 8oz glass bottle or jar
- 7 vanilla beans (I actually added about 9 beans to a cup)
- 1 cup Vodka 70 proof/35% alcohol

Method :

1)  Slice each bean and place in a bottle.

2)  Pour 1 cup of Vodka into the bottle.  Make sure the vanilla beans are completely submerged.

3)  Shake it once or thrice a week.

4)  Wait for about a minimum of 8 weeks.

This is about 4 months old.
I actually made 750ml of extract!!!

A neverending supply of homemade vanilla extract and to give away as gifts too!
Harvest it into small dark bottles, if you prefer.


To receive new updates, do LIKE SIMPLY BEAUTIFUL AND HEALTHY LIVING FACEBOOK. Sorry to inform that for the time being, I have disabled comment box as I won't be able to return visit to my fellow bloggers who are kind enough to drop me a line or two. The comment box will be enabled when I am not so tied up with my work schedule. However, you may contact me by leaving message at SIMPLY BEAUTIFUL AND HEALTHY LIVING FACEBOOK. My sincere apologies for any inconvenience caused. Thanks for visiting my blog and have a nice day :)