Tuesday, 15 October 2013

Miso Glazed Salmon with Peach Jam

Initially, I wanted to cook salmon with orange but realized that I didn't have any oranges left! Then I remembered I have bookmarked  a meat recipe using jam from Phong Hong's blog but have yet to try her  Pineapple and Mango Jam Roasted Belly.  Aha....... my hubby just bought 2 bottles of peach jam and why not?????  If Phong Hong can use jam for roasted belly so successfully, why not I try it on salmon?  Well, I am glad that I gave this recipe a try.  

Using miso and peach jam gives the salmon a very flavorful sweet caramelized taste.  Besides,  it is very appetizing too.  The sweet-savory miso peach glaze on the salmon is so delicious that my children practically licked every drop of the sauce off the plate! And, to tell you the truth, this is my first time using miso for salmon and it is SO EASY to prepare too!!!  

Ingredients :
- 2 salmon fillets (marinated with miso mixture for 20 minutes)
- 1/2 tbsp butter
Marinate : (to taste)
- 1 tbsp miso
- 1 tsp ginger juice
Sauce Mixture: (to taste)
- 2 tbsp peach jam (you can use any fruits jam)
- 1 tsp apple cider vinegar or lemon juice (I used acv as I didn't have any lemon on that day)
- a dash of sugar

Seasoning : (to taste)
- soy sauce/liquid aminos

Method :
1)  Heat butter in a pan (I used happy call pan).  Arrange salmon fillets and pan fry until both sides are slightly brown.
2)  Add seasoning on both sides of the fillets.  (I used liquid aminos).
3)  Lower the heat to the minimum.  Spread the combined sauce on both sides of the fillets.  Make sure to turn off the heat if the pan is overheated as the sauce tends to burn quite easily.
4)  Lightly pan fry (with minimum heat or with the heat off) the fillets on both sides.
5)  Dish up and serve.  
Do add extra sauce and you will thank me for that!

Hope you like this simple and appetizing dish :)


This post is linked to the event, Little Thumbs up organised by Doreen from my little favourite DIY and Zoe of Bake for Happy Kids, hosted by Mich of Piece of Cake at this post.

To receive new updates, do LIKE me on FACEBOOK. Thanks!

http://www.bloglovin.com/en/blog/6015563 Follow this blog with bloglovin Follow on Bloglovin Thanks for visiting my blog and leaving me comments.. I really appreciate all your visits and comments! Have a nice day :)

Wednesday, 9 October 2013

Braised Soft Tofu (Bean curd) with Thai Basil (Meatless Recipe)

Tofu (Japanese: 豆腐 or とうふ; Chinese: 豆腐), also called bean curd, is a food made by coagulating soy milk and then pressing the resulting curds into soft white blocks. It is a component in many East Asian and Southeast Asian cuisines. There are many different varieties of tofu, including fresh tofu and tofu that has been processed in some way. Tofu has a subtle flavor and can be used in savory and sweet dishes. It is often seasoned or marinated to suit the dish.  Please click  http://en.wikipedia.org/wiki/Tofu for more info on tofu.
 My family likes to eat tofu and I used to cook it regularly.  As for this braised tofu, the recipe just created out of what I can find in my fridge! You can add any ingredients that you like and it's still yummy.

Ingredients :
- 4 blocks of soft tofu (cut)
- 2 tomatoes (cut into wedges)
- a handful of shredded preserved mustard head/Spicy Szechuan Mustard (soaked)
- a handful of fresh Thai Basil
- 3 cloves garlic (crushed)
- oil
- water (add more water if you want extra sauce)
Seasonings : (to taste)
- 1 tbsp miso
- salt
- a dash of sugar

Method :
1)  Heat oil in a pan and lightly pan fry tofu.  
2)  Add garlic, tomatoes and shredded preserved mustard head.

3)  Lightly stir and mix well.  Then, add miso.

4)  Add water and braise over medium high heat.
5)  When it is almost done, add salt to taste, sugar and fresh Thai basil.

6)  Stir and mix well.
7)  Serve with steamed rice.
This dish is suitable for vegetarians and you can just omit the garlic for religious purposes
Or if you are just going for a meatless meal, this is just a perfect dish
Hope you like this simple yet healthy tofu dish


This post is linked to the event, Little Thumbs up organised by Doreen from my little favourite DIY and Zoe of Bake for Happy Kids, hosted by Mich of Piece of Cake at this post.


To receive new updates, do LIKE me on FACEBOOK. Thanks!
http://www.bloglovin.com/en/blog/6015563 Follow this blog with bloglovin Follow on Bloglovin Thanks for visiting my blog and leaving me comments.. I really appreciate all your visits and comments! Have a nice day :)

Thursday, 3 October 2013

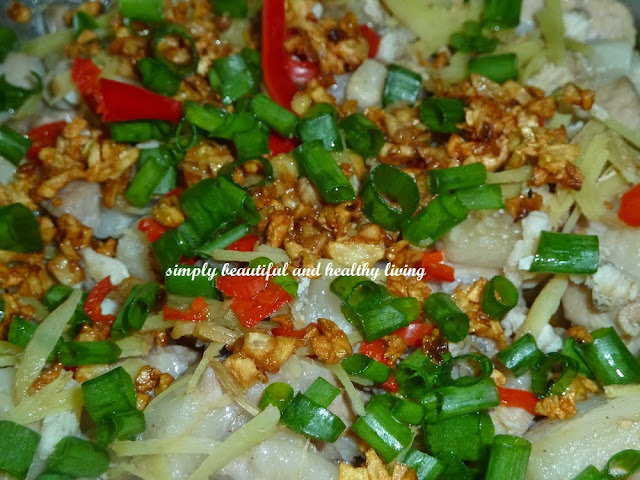
Steamed Pork Belly with Salted Fish (咸鱼蒸猪肉)

This is a very simple and yet appetizing dish which is popular among Chinese.  I have been preparing this particular dish on and off but didn't realize that I have in fact missed out one particular important seasoning.  This important ingredient is TAPIOCA FLOUR!!!! See how ignorant I am!!!  Well, I should thank Y3K when I chanced upon this in the Y3K issue no. 31, page 8.
Recipe source : Y3K(31) page 8 by Ms Catherine Chia

Frankly speaking, previously it never cross my mind to marinate meat with tapioca flour for steaming dish.  I do use tapioca flour for other methods of cooking but why not in steaming? Still scratching my head!!!  From here, you should know how good I am in cooking, right? Well, it's still  better late than never!
Meat marinated in corn starch or tapioca flour is tenderer and softer and since then, corn flour plays one of the important ingredients in my kitchen!
Ingredients :
- 2 strips of pork belly (skinned and sliced)
- 50g mui heong salted fish (rinsed, diced)
- 2 tbsps young shredded ginger
- 1 red chili (sliced)
Seasonings :
- 1/2 tsp salt
- 1/2 tsp sugar
- 1 tsp oyster sauce (I omitted this)
- 1/4 tsp pepper
- 1/2  chicken granules stock (I omitted this too)
- 1/2 tbsp tapioca flour
Garnishing :
Diced spring onions
Some fried minced garlic
Method :
1)  Marinate sliced pork belly with seasonings.  I let it marinated for about 20 minutes.
2)  Meanwhile, boil water in a steamer.
3)  Add shredded diced salted fish, ginger and chili on top of the marinated pork belly.
4)  Steam for 10 minutes. (I steamed it for 15 minutes over high heat).
5)  Remove and garnish it with diced spring onions and fried onions.
4)  Serve it hot with  steamed rice.
Simple, quick and easy
Be advised to cook extra rice if you are serving this for your family


I'm linking this post with :Cook-Your-Books #4 hosted by Kitchen Flavours


To receive new updates, do LIKE me on FACEBOOK. Thanks!
http://www.bloglovin.com/en/blog/6015563 Follow this blog with bloglovin Follow on Bloglovin Thanks for visiting my blog and leaving me comments.. I really appreciate all your visits and comments! Have a nice day :)