Monday 8 September 2014

Happy Mid-Autumn Festival and Simple and Easy Red Bean Paste Snow Skin Mooncake

First of all, to all Chinese, HAPPY MID-AUTUMN FESTIVAL and happy family reunion.  

Today is Mid-autumn festival but I had already celebrated it yesterday as it was a Sunday and it was also my eldest girl's birthday.  So, to make things easier and convenient for everyone, we had a double celebration yesterday.


   For my darling girl's birthday, I baked Canadian Lemon Pound Cake  (<-- click  here for the recipe) for her.
In fact it was my first time baking a birthday cake for my girl.  In order to give her a surprise, I baked it when she was away for her ballet lesson.  By the time she arrived home, the cake was ready and of course, she was thrilled to see her first home baked birthday cake from her mum!!

Not only that, I had also made my first snow skin mooncake when the lady boss of the bakery supplier shop taught me how to do it.  So, with her ready recipe, I gave this a try, and I am glad I did it! Never know it's so easy to make snow skin mooncake.  
Ingredients for snow skin :  (I made 16 minis and 2 big snow skin mooncakes)
- 100gm kaofen (sifted)
- 80gm icing sugar (sifted)
- 30gm shortening
- 150ml iced water

Filling :
- 500gm red bean paste (store bought)
(divide into 16 portions of 25gm each and 2 portions of 50gm each.  Shape into balls)

Method :
1)  Mix kaofen, icing sugar and shortening until well combined.
2)  Add iced water and use a spatula to combine the mixture until dough is formed.
3)  Divide dough into 16 portions of 15gm each (for minis mooncakes) and 2 portions of 30gm each of dough (for big mooncakes).
4)  Flatten each dough with rolling pin and wrap it around 1 piece of filling.
5)  Lightly dust the ball of dough with kaofen and press the ball into a mooncake mould.  Press out.


6)  Keep mooncakes in an air-tight container and chill in the fridge before serving.
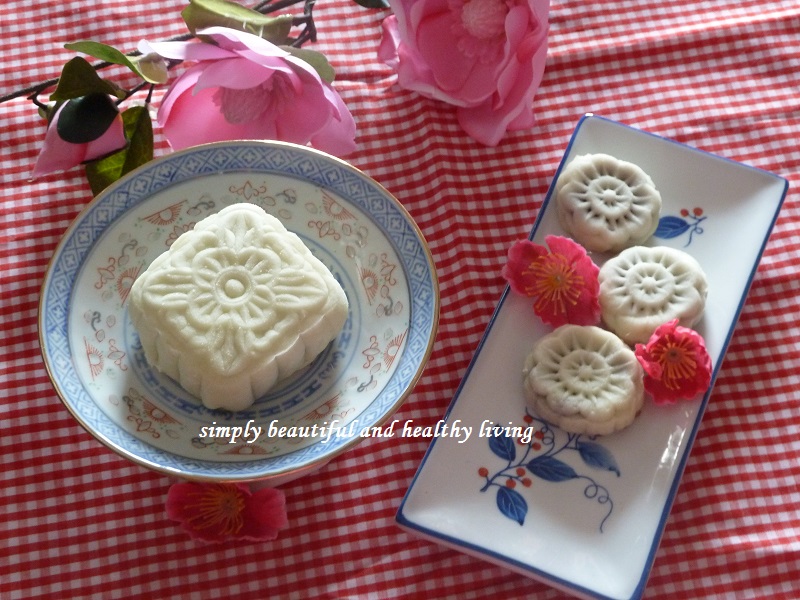
Happy Mooncake Festival and Have a wonderful Family Reunion :)

To receive new updates, do LIKE SIMPLY BEAUTIFUL AND HEALTHY LIVING on FACEBOOK. Thanks for visiting my blog and leaving comments. I really appreciate all your visits and comments! Have a nice day :)

Monday 18 August 2014

Fragrant Pork Belly with Thai Basil

My mini garden has been growing weeds....!!! Hubby wanted to throw away all my plants especially those inedible plants and keep those edible ones. What should I do??? I still want to keep my plants especially those herbs which I need it every now and then. At the end, we decided to keep only the edible plants and concentrate on edible garden which we think is more practical. Thai basil is in abundance and they are in fact too matured. So, what I did was to harvest all the herbs and replant them for another new batch of herbs garden.
Since Thai Basil is in abundance, I decided to fully utilize it. Hence, stewing pork belly with it is one of the many dishes I have cooked.

For your info, when I was young, I never like or would not touch pork belly. Even when I ever did eat it, I would always throw away the fat and take the lean meat. However, these few years, I don't know what has gotten into me. I LIKE pork belly especially the FAT!!! I know it's unhealthy but ah..... eat first health later... hahahaha.... The gravy is especially yummy and when mixed with rice, we can easily go for 2nd helping of rice! The recipe for this is taken from my previous posting on Stewed Pork Belly with Fried Tofu.

Ingredients :
- 1 strip of pork belly (blanched and cut)
- 1 bunch of Thai Basil
- 1/2 tbsp fermented soy bean paste/tau cheong (for frying)
- 1 1/2 tbsp fermented soy bean paste/tau cheong (to taste)
- 1 bulb of garlic (finely chopped)
- 1 thumbsized ginger (sliced and crushed)
- water (enough for stewing)

Seasonings : (to taste)
- a dash of salt
- 2 tbsp light soy sauce
- 3 tbsp caramel sauce (reduce the amount if you don't like your dish to be in dark colour)
- 1 tsp sugar

Method :
1) Heat some oil in a wok and saute garlic, ginger and 1/2 tbsp of fermented soy bean paste until aromatic.

2) Add pork belly and stir fry for a while. Mix well.

3) Add water, the remaining fermented bean paste and caramel sauce. Stir and mix well.

4) Cover and let it boil at high heat for about 5 minutes. Then, lower the heat and let it simmer until the gravy is thickened and/or the meat is cooked and tender. It takes about 30 to 45 minutes depending on the fire and pot/wok used. Add water if you want more gravy.

5) Lastly, add in Thai Basil and the remaining seasonings. Bring it to a boil again for 1 or 2 minutes.

6) Dish up and serve with steamed rice.

If you like pork belly, this is a very flavorful dish
Hope you like this homey dish. It's also great to serve it with plain bread instead of steamed rice. Do enjoy.

I am linking this to TheWeekendSocial- Recipe & DIY Link Party


To receive new updates, do LIKE SIMPLY BEAUTIFUL AND HEALTHY LIVING on FACEBOOK. Thanks for visiting my blog and leaving comments. I really appreciate all your visits and comments! Have a nice day :)

Monday 11 August 2014

Zucchini Carrot Loaf

When I first saw Phong Hong's Zucchini bread, I told myself, wow, this is great! Why???? Well, I like zucchini and another main reason is that this recipe is healthy and so easy to make. Being so excited, I baked it the following day and I am glad that I did it without any procrastination. We like the bread/cake so much that I baked it again for a karaoke session with a group of childhood friends.
However, for this get-together, instead of a loaf, I baked it into 'cupcakes'; reason was for easy handling and besides, this is also great as party food.
The loaf is soft and moist and taste like a cake
However, the 'cupcake' is not too moist and soft and taste more like bread
Which one do you like?

Zucchine Bread
Recipe source : adapted from Phong Hong (with some minor modification)

Ingredients :
- 1/2 cup olive oil
- 200g self-raising flour
- 50g sugar (due to the addition of raisins, I reduced the sugar)
- 2 eggs, lightly beaten
- 1 tsp vanilla extract
- 1 tsp cinnamon
- 1tsp ground nutmeg
- 1 cup grated zucchini
- 1 cup grated carrot
- 1 cup of mixed raisins

Method :
1. In a large bowl, mix sugar, eggs and vanilla until well combined.
2. Stir in the grated zucchini and carrot. Then followed by the oil. Mix till well blended.
3. Sift in flour 1/3 at a time over no. 2 and mix well.
4. Add raisins, cinnamon and nutmeg.  Mix well.
5. Pour batter into a lined or greased 4" x 9" x 3" loaf pan or cupcake/muffin cups.
6. Bake in a preheated oven at 160C for 40 to 45 minutes (for loaf) or 180C for 20 minutes (for muffin or cupcake cups) or until cooked; depending on individual oven temperature.
7. Let cool in pan for about 10 mins before unmoulding onto a wire rack to cool completely.

Do head over to Phong Hong's Bake for her original recipe. Do give this a try and you will love it.

The loaf tasted like fruit cake


Whereas the 'cupcakes' is more towards like bread


It tastes even better after one or two days


Do have a great week ahead and cheers :)


To receive new updates, do LIKE SIMPLY BEAUTIFUL AND HEALTHY LIVING on FACEBOOK. Thanks for visiting my blog and leaving comments. I really appreciate all your visits and comments! Have a nice day :)