Thursday 30 April 2015

How to DIY Vanilla Extract and Having an Almost Neverending Supply of Vanilla Extract in your Pantry (Homemade Vanilla Extract)

Talking about vanilla.  Do you know the difference between vanilla essence and vanilla extract?  I am sure those who are not into baking may not know the difference.  Well I never favor commercial vanilla essence.  The fragrance is too strong to my liking and smells like perfume to me.  Very fake!  Moreover I believe, commercial vanilla essence is sweetened too.  So, prior to my decision to DIY my own homemade vanilla extract, I either omitted the use of vanilla in my baking or if I needed it, I only use premium quality commercial vanilla extract.  There is quite a big difference between vanilla extract and vanilla essence.
So, what is the difference between vanilla extract and vanilla essence/flavor? Vanilla extract  is produced by soaking the vanilla pods or beans in a mixture of alcohol base like vodka and/or water. Whereas for vanilla essence, it is chemically produced  and often give a synthetic taste to your baking.  Vanilla essence is much much cheaper than the natural vanilla extract.  So, if you need to buy commercial vanilla extract, do look at the label to confirm that it's vanilla extract and not vanilla essence or flavor.
However, I am glad to say that I have no regrets to DIY my homemade vanilla extract.  It's so easy to do and you only need 2 ingredients and 3 simple steps to be a proud owner of  your homemade vanilla extract!  It's advisable to buy premium grade vanilla beans as the quality of your vanilla extract depends on the quality of your vanilla beans.  
When choosing vanilla beans, avoid beans which are smoky, brittle, dry or mildewed.  Good quality beans should have a rich aroma.  Always choose plump beans with a thin skin to get the most seeds possible.  To test, gently squeeze the bean between your fingers and it should be soft and pliable enough to wrap around your finger without breaking.  The pods should be dark brown and almost black in color.
Now, it's time to DIY your very own homemade Vanilla Extract :
Recipe and info source : Beanilla
Ingredients  :  
- 8oz glass bottle or jar
- 7 vanilla beans (I actually added about 9 beans to a cup)
- 1 cup Vodka 70 proof/35% alcohol

Method :

1)  Slice each bean and place in a bottle.

2)  Pour 1 cup of Vodka into the bottle.  Make sure the vanilla beans are completely submerged.

3)  Shake it once or thrice a week.

4)  Wait for about a minimum of 8 weeks.

This is about 4 months old.
I actually made 750ml of extract!!!

A neverending supply of homemade vanilla extract and to give away as gifts too!
Harvest it into small dark bottles, if you prefer.


To receive new updates, do LIKE SIMPLY BEAUTIFUL AND HEALTHY LIVING FACEBOOK. Sorry to inform that for the time being, I have disabled comment box as I won't be able to return visit to my fellow bloggers who are kind enough to drop me a line or two. The comment box will be enabled when I am not so tied up with my work schedule. However, you may contact me by leaving message at SIMPLY BEAUTIFUL AND HEALTHY LIVING FACEBOOK. My sincere apologies for any inconvenience caused. Thanks for visiting my blog and have a nice day :)

Wednesday 1 April 2015

Easy and Cottony Soft Raisins Oat Bread Using Straight Dough Method

For those who have been following me should know that I am crazy over homebaked bread and have been baking my own bread for my family members and friends.  If you are still new and hesitating whether to try your hands in baking your own bread, no more procrastinating.  Give yourself a try and you will be happy that you did it.  Homebaked bread is anytime healthier and yummy than commercial bread as you can adjust the taste according to your taste buds. 
Well, do give this easy peasy and cottony soft Raisins Oat Bread a try.  You may bake this whole process in your bread machine or knead the dough inside your bread machine and bake it in the oven.  Do it whichever method you feel comfortable.  
This recipe has gone through several trials and errors and finally I am glad to share it with my followers and readers. 

Easy Raisins Oat Bread
Ingredients :
- 288ml water
- 5 tbsp instant oat
- 5 tbsp milk powder
- 3 tbsp sugar
- 1 tsp Himalayan salt
- 3 tbsp softened butter
- 400gm unbleached bread flour
- 1/2 cup raisins (or any measurement as per your requirement)
- 1 tsp instant yeast

Method :
1)  Put all measured ingredients in the bread machine pan in accordance to the above sequence or in the order recommended by the bread machine manual. You may add dried fruits when smooth dough is formed.  Also take note that different machine may have different functions.

2)  Select dough if you are baking the bread in the oven. (I used dough method functions). Otherwise, select sweet or basic white bread.  Please take note different machine has different function.

3)  Remove dough from bread pan when you hear beeping sound.  

4)  Put the dough on a lightly floured surface and shape it into a rectangular shape.

5)  Place the shaped dough into greased and lightly floured loaf pan.  Cover with damp cloth and let it proof for another 45 minutes or more for a second time proofing.

6)  Once they are doubled in size, if you prefer a glazed and glossy crust, glaze it with egg wash or butter.

7)  Bake in a preheated oven at 170°C - 180°C for about 40 to 45 minutes or until golden brown; depending on individual's oven. Do adjust the temperature and timing accordingly.

8) Remove and cool on wire rack.

Healthy bread for your family
To all my fellow bloggers who are always kind enough to drop me a line or two, please take note that I have disabled the comment box as I feel guilty not returning visit to your cyber home.  Will enable the comment box once I am able to return visit.  Thanks for all your previous lovely and sweet comments.  

To receive new updates, do LIKE SIMPLY BEAUTIFUL AND HEALTHY LIVING FACEBOOK. Sorry to inform that for the time being, I have disabled comment box as I won't be able to return visit to my fellow bloggers who are kind enough to drop me a line or two. The comment box will be enabled when I am not so tied up with my work schedule. However, you may contact me by leaving message at SIMPLY BEAUTIFUL AND HEALTHY LIVING FACEBOOK. My sincere apologies for any inconvenience caused. Thanks for visiting my blog and have a nice day :)

Friday 13 March 2015

Easy Peasy and Hassle-Free Apple Cinnamon Muffins

Yes, I am back after being MIA for about a month due to unavoidable circumstances.  Well... work and family is still my top priority and especially when there's a deadline to meet and you are rushing for an urgent project.  
To my fellow bloggers, I will visit your cyberhome as soon as possible whenever I am available and here's a very easy to follow muffins for those who are always in a hurry to prepare something healthy yet yummy for your family.
 

Apple Cinnamon Muffins
Adapted from Cupcakes & Muffins (page 220) with minor modification in red
Ingredients :
- 250g  all-purpose flour
- 1 tbsp baking soda
- 1.5 tsp (1 tbsp) ground cinnamon + extra, for dusting
- 110g caster sugar
- 2 eggs lightly beaten
- 250ml milk
- 160ml light olive oil
- 2 ripe pears (apple) peeled, cored and diced


Method :
1)  Preheat oven to 200. Prepare 18 paper liners in standard muffin pans.
2)  Whisk together flour, baking soda, cinnamon and sugar in a large mixing bowl.
3)  Combine egg, milk and oil, then stir into the dry ingredients until just combined.
4)  Gently fold in two-thirds of apple.
5)  Spoon into prepared pans and top each muffins with remaining apple.
6)  Dust with extra cinnamon and bake for 20 minutes or until golden brown and the center of a muffin springs back when pressed.
7)  Cool in pan for 5 minutes, then transfer to a wire rack to cool completely.
Apple and Cinnamon ~ complement each other beautifully
Quick yet yummylicious muffins just perfect for breakfast or tea-time


To receive new updates, do LIKE SIMPLY BEAUTIFUL AND HEALTHY LIVING on FACEBOOK. Thanks for visiting my blog and leaving me comments. I really appreciate all your visits and comments! Have a nice day :)

Tuesday 17 February 2015

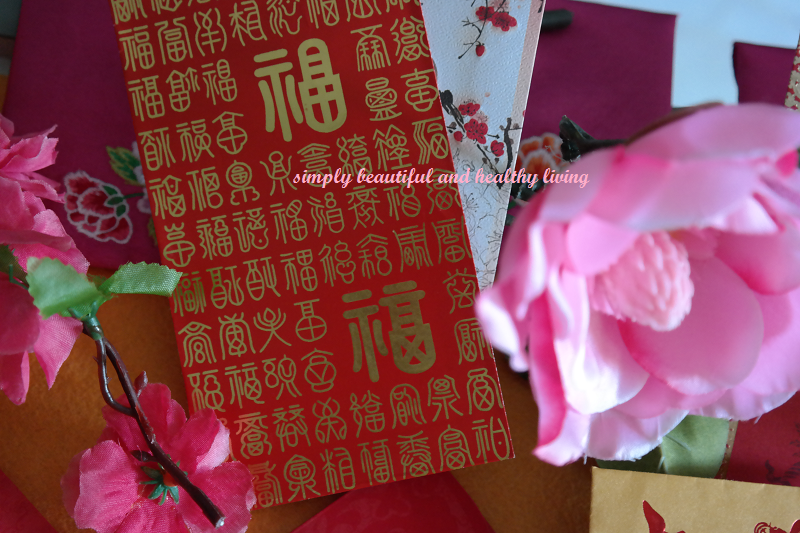
Have A Bountiful and Prosperous Chinese New Year 2015

Chinese New Year celebration is also known as the Spring Festival.  This year the Chinese celebrate Spring Festival on Thursday 19 February, and ends on 5 March.
 
This year also marks the start of the Year of the Wood Sheep,  according to the Lunar New Year calendar in the Chinese zodiac.  As the year 2015 is the Year of the Wood Sheep, it is believed that those born under under this sign are going to have a good year, with plenty of good luck and opportunities ahead.
People born in the Year of the Sheep are thought to be loyal, good nature and kind.
Like Christmas in the West, people exchange gifts during the Spring Festival. The most common gifts are red envelopes. Red envelopes have money in, and are given to children and (retired) seniors. 
Do refer to the Significant of Ang Pows in my last year post to know more about the importance of these red packets.
During the next 15 days, friends and family will visit each other to exchange gifts and wish each other a prosperous new year. 
Here, I take this opportunity to wish all my Chinese readers :
*Μay Yοu Have The Pοckets of Ηappiness, 
Τhat Will Αttract Αll The Good Wishes, 
Τhis Year, Ι Αm Ρutting First Wish Ιn It, 
Βy Wishing You Α Bountiful Lunar Νew Year!*
*Fun, Jοy, Happiness, Ρeace, Lοve, Luck, will cοme to you, with my special Wish*
*Always welcome the new morning with a new spirit, a smile on your face, love in your heart and good thoughts in your mind*
*With each passing moments, let us embrace the Lunar New Year with a brighter, colorful, and joyous future!*
*May the Goat year bring you life full of joy that never fade, hopes that never die, strength that never weakens and take you as high as the sky. Wishing you a very Happy & Prosperous Chinese New Year*

To receive new updates, do LIKE SIMPLY BEAUTIFUL AND HEALTHY LIVING on FACEBOOK. Thanks for visiting my blog and leaving me comments. I really appreciate all your visits and comments! Have a nice day :)

Wednesday 28 January 2015

Flavorful Braised Pork Belly with Pumpkin

My goodness, time really flies and 2015 is entering its second month soon.  My sincere apologies to all for not posting anything since New Year and not visiting my fellow bloggers' cyberhome.  Well, I have been very occupied with a new project (it's a good start for me in 2015; new project means extra pocket money for me, besides my full-time job...yeah! ) which I have been rushing to meet its dateline since I came back from my year-end holidays.  Well, to all who sent their greetings and wishes last year, I thank you from the bottom of my heart and may you all enjoy good health and prosperity in whatever you are doing.
Here's my 1st post for 2015 and I hope you all like this simple but very flavorful Asian braised pork belly with pumpkin.  If you wish to know the health benefits of pumpkin, click the pic  below for more info.

Flavorful Braised Pork Belly with Pumpkin
Ingredients :
- 1 strip of pork belly (blanched and cut into bite size)
- 1 bowl of cubed pumpkin (with the skin intact)
- 1 thumb sized ginger (crushed)
- 1 tbsp fermented black beans (tau si)
- soy sauce to taste
- water
- Cooking oil
Method :
1)  Heat some oil in a pan or wok.
2)  Saute ginger and  fermented black beans until aromatic.
3)  Add cubed pork belly and stir fry for awhile.  Mix well.
4)  Add water until it covers the meat.
5)  Cover and let it boil at high heat for 5 minutes.  Then lower the heat and simmer until the meat is cooked and tender.  This takes about 35 to 45 minutes depending on the type of pot used.  I used AMC medium pot.  Add more water if you prefer more gravy.

6)  When the the meat is cooked and gravy thickened, add cubed pumpkin.

7) Cover and continue to cook until the pumpkin is cooked and soft.  This takes about 5 to 8 minutes.  Add soy sauce to taste.  Stir and mix well.
8)  Serve hot with steamed rice.
A very simple yet flavorful dish
You can substitute pork belly with chicken too. 
A homey dish which our family have never get tired of it since our grandma days.
Note :  No salt is added as the fermented black beans itself is already salty.  


To receive new updates, do LIKE SIMPLY BEAUTIFUL AND HEALTHY LIVING on FACEBOOK. Thanks for visiting my blog and leaving me comments. I really appreciate all your visits and comments! Have a nice day :)